So here’s the info on how we set up CSAT using our WordPress website, Gravity Forms, and the ConnectWise surveys API.
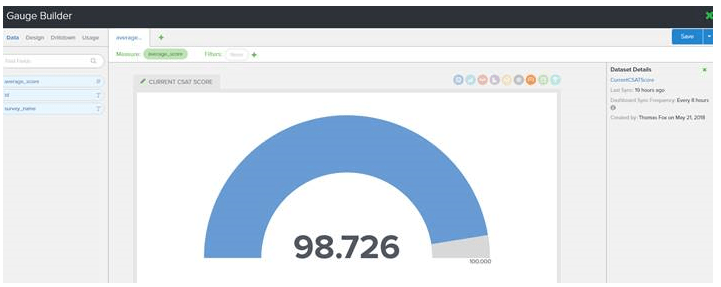
Someone asked about BrightGauge reporting – that’s the cool thing about this! Because it is using the ConnectWise survey API to record the responses on the ticket, standard BrightGauge reporting works.
Here is the SQL to create the dataset in BrightGauge:
SELECT
AVG([dbo].[v_rpt_Surveys].[Score])*100 AS 'Average(Score)',
[dbo].[v_rpt_Surveys].[SurveyName] AS 'Survey Name',
NEWID() as id
FROM [dbo].[v_rpt_Surveys] WITH(NOLOCK)
WHERE  ([dbo].[v_rpt_Surveys].[SurveyName] = 'CSAT Survey')
GROUP BY [dbo].[v_rpt_Surveys].[SurveyName]
To get started, you’ll need to create your CSAT survey in ConnectWise. Most of this stuff won’t matter:
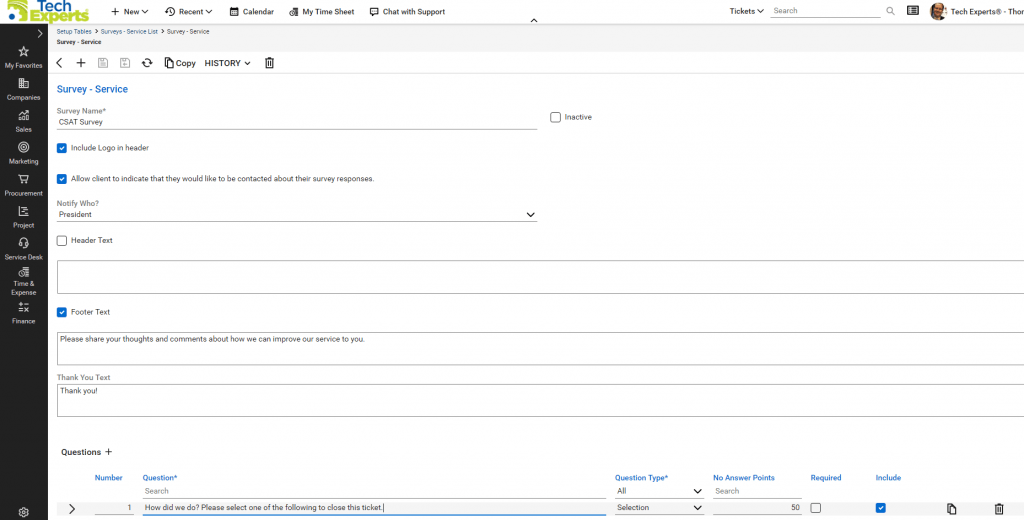
It should have one question, with 4 possible answers:

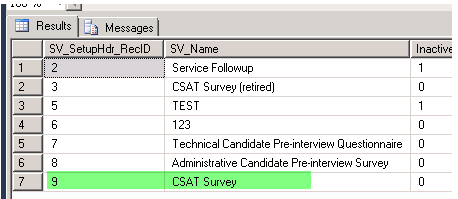
On your ConnectWise server, open up SQL server management studio, select your CW database, and drill down to dbo.SV_SetupHdr. You’re looking for the SV_SetupHDR_RecID of the CSAT survey you just created. In my database, it is 9:
You’ll also need the question number for your CSAT survey’s question. You’ll find that in dbo.SV_SetupDtl. You’re looking for the SV_SetupDtl_RecID of the question for the survey number you found in the step before this one. In my database, it’s 46:
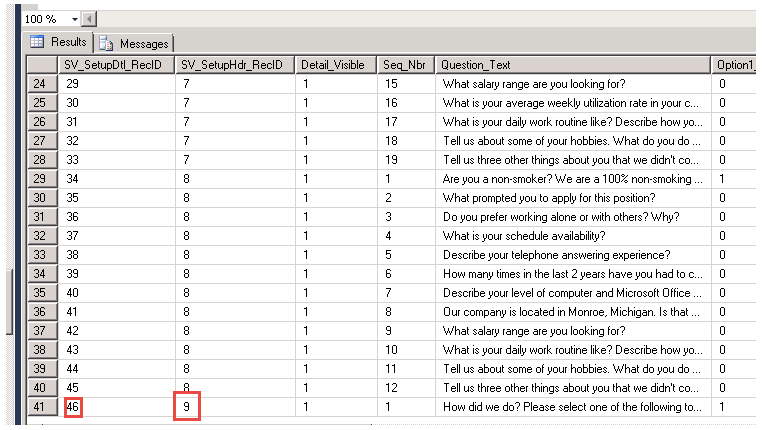
So, our survey number is 9, and our question number is 46.
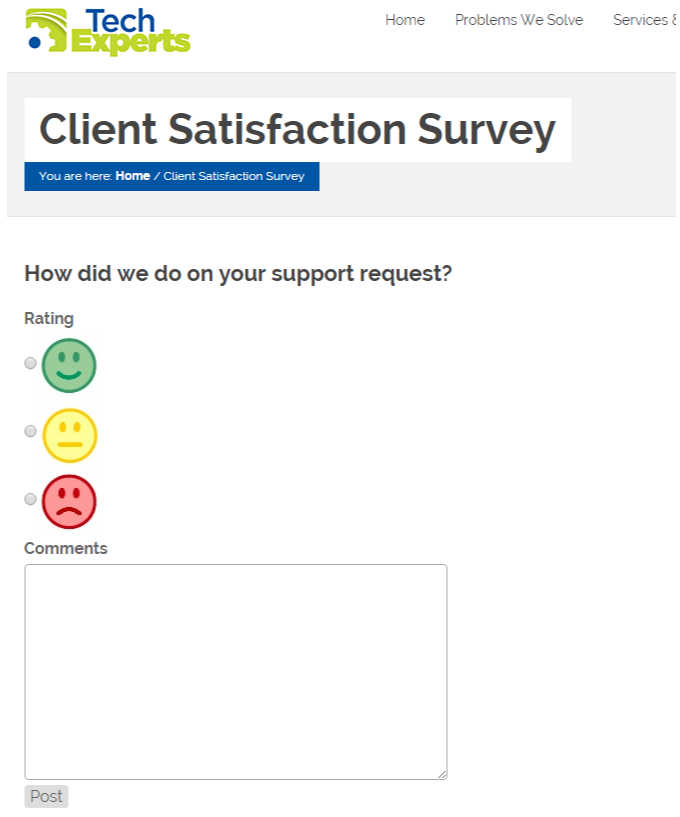
On your WordPress site, set up a Gravity Form for your CSAT survey. This is what ours looks like to the client:
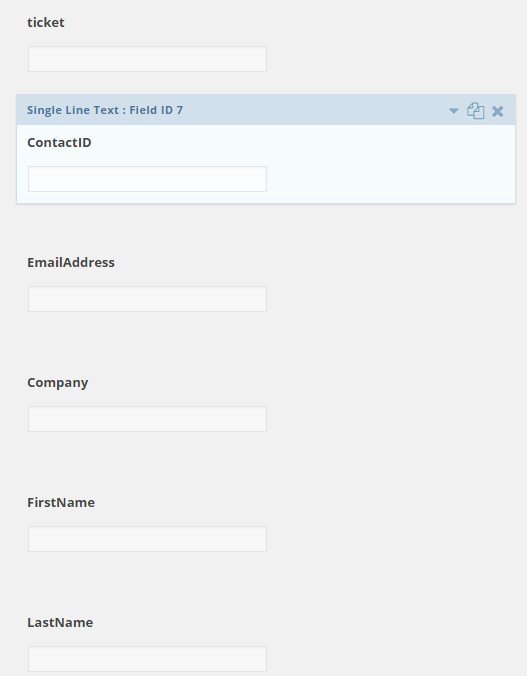
Behind the scenes, we have some hidden fields. You need these in order to create the API call. I’ve attached an export of our Gravity Forms form so you can see the fields and names. You can use different names but you’ll have to update the API call.
In your site’s functions.php, you need to add the hook for gravity forms after form submission action. The text file attached is the additional action, but it looks like this:
add_action( 'gform_after_submission', 'post_to_third_party', 10, 2 );
function post_to_third_party( $entry, $form ) {
then paste in the actual code:
$curl = curl_init();
$tkt = rgar( $entry, "2");
$email = rgar( $entry, "8");
$cmt = rgar( $entry, "5");
$con = rgar( $entry, "7");
$rsp = rgar( $entry, "1");

curl_setopt_array($curl, array(
  CURLOPT_URL => "<a href="https://connect.mytechexperts.com/v4_6_release/apis/3.0/service/surveys/9/results">https://connect.mytechexperts.com/v4_6_release/apis/3.0/service/surveys/9/results</a>",
  CURLOPT_RETURNTRANSFER => true,
  CURLOPT_ENCODING => "",
  CURLOPT_MAXREDIRS => 10,
  CURLOPT_TIMEOUT => 30,
  CURLOPT_SSL_VERIFYPEER => false,
  CURLOPT_HTTP_VERSION => CURL_HTTP_VERSION_1_1,
  CURLOPT_CUSTOMREQUEST => "POST",
    CURLOPT_POSTFIELDS => "{\r\n  \"ticketId\": $tkt,\r\n  \"emailAddress\": \"$email\",\r\n  \"footerResponse\": \"$cmt\",\r\n  \"contactMeFlag\": false    ,\r\n  \"contact\": {\r\n    \"id\": $con,\r\n    \"name\": \"string\",\r\n    \"_info\": {}\r\n  },\r\n  \"results\": [\r\n    {\r\n      \"questionId\": 46,\r\n      \"answer\": $rsp\r\n    }\r\n  ],\r\n  \"surveyId\": 0,\r\n  \"_info\": {}\r\n}",
  CURLOPT_HTTPHEADER => array(
    "authorization: Basic <your-auth-code-goes-here>",
    "cache-control: no-cache",
    "content-type: application/json",
    "postman-token: ca098b0a-b1e1-1aee-d734-b7c0afb4e9e5"),));

$response = curl_exec($curl);
$err = curl_error($curl);
curl_close($curl);}
The rgar variables are the gravity forms field numbers. They may be different on your system. To get your actual field numbers, I used the code on this site: http://0to5.com/gravity-forms-submitting-forms-to-3rd-party-applications/
Once you have the field numbers, modify the function to use your correct field numbers. In addition, you need to modify these lines:
CURLOPT_URL => "<a href="https://connect.mytechexperts.com/v4_6_release/apis/3.0/service/surveys/9/results">https://connect.mytechexperts.com/v4_6_release/apis/3.0/service/surveys/<strong>9</strong>/results</a>",
In this line, set your URL for ConnectWise, and change the 9 to your SV_SetupHDR_RecID value.
CURLOPT_POSTFIELDS => "{\r\n  \"ticketId\": $tkt,\r\n  \"emailAddress\": \"$email\",\r\n  \"footerResponse\":
\"$cmt\",\r\n  \"contactMeFlag\": false    ,\r\n  \"contact\": {\r\n    \"id\": $con,\r\n    \"name\": \"string\",
\r\n    \"_info\": {}\r\n  },\r\n  \"results\": [\r\n    {\r\n      \"questionId\": 46,\r\n      \"answer\": $rsp\r
\n    }\r\n  ],\r\n  \"surveyId\": 0,\r\n  \"_info\": {}\r\n}",
In this line, you need to change the question ID to your questions SV_SetupDtl_RecID – 46 in my example, it will be different for you.
Finally, you’ll need to change your authorization token here:
"authorization: Basic <your-auth-code-goes-here>"
To get your authorization key, follow these directions on the CW site here: https://developer.connectwise.com/SOAP_Documentation/API_Permissions
I’m using the API key method.
The last piece of the puzzle is calling your form from your survey email in CW, placing the needed variables in the URL:
<h4>Please click a smiley face to tell us how we did on this service request.</h4>
<table cellpadding="4" border="0">
<tr>
<td style="border: 0">
<a href="<a href="http://www.mytechexperts.com/csat/?Rating=1&Ticket=%5bsrnumber%5d&ContactID=%5bcontactrecordid%5d&EmailAddress=%5bcontactemail%5d&Company=%5bcompanyname%5d&FirstName=%5bcontactfirstname%5d&LastName=%5bcontactlastname%5d">http://www.mytechexperts.com/csat/?Rating=<strong>1</strong>&Ticket=[srnumber]&ContactID=[contactrecordid]&EmailAddress=[contactemail]&Company=[companyname]&FirstName=[contactfirstname]&LastName=[contactlastname]</a>" style="background:#339966;display:block;width:55px;height:55px;max-height:55px;border:0;"><img alt="Rate: Good" src="<a href="http://www.mytechexperts.com/wp-content/uploads/2015/01/good.jpg">http://www.mytechexperts.com/wp-content/uploads/2015/01/good.jpg</a>" height="55" width="55" border="0"></a>
</td>
<td style="border: 0">
<a href="<a href="http://www.mytechexperts.com/csat/?Rating=2&Ticket=%5bsrnumber%5d&ContactID=%5bcontactrecordid%5d&EmailAddress=%5bcontactemail%5d&Company=%5bcompanyname%5d&FirstName=%5bcontactfirstname%5d&LastName=%5bcontactlastname%5d">http://www.mytechexperts.com/csat/?Rating=<strong>2</strong>&Ticket=[srnumber]&ContactID=[contactrecordid]&EmailAddress=[contactemail]&Company=[companyname]&FirstName=[contactfirstname]&LastName=[contactlastname]</a>" style="background:#FFCC00;display:block;width:55px;height:55px;max-height:55px;border:0;"><img alt="Rate: Neutral" src="<a href="http://www.mytechexperts.com/wp-content/uploads/2015/01/ok.jpg">http://www.mytechexperts.com/wp-content/uploads/2015/01/ok.jpg</a>" height="55" width="55" border="0"></a>
</td>
<td style="border: 0">
<a href="<a href="http://www.mytechexperts.com/csat/?Rating=3&Ticket=%5bsrnumber%5d&ContactID=%5bcontactrecordid%5d&EmailAddress=%5bcontactemail%5d&Company=%5bcompanyname%5d&FirstName=%5bcontactfirstname%5d&LastName=%5bcontactlastname%5d">http://www.mytechexperts.com/csat/?Rating=<strong>3</strong>&Ticket=[srnumber]&ContactID=[contactrecordid]&EmailAddress=[contactemail]&Company=[companyname]&FirstName=[contactfirstname]&LastName=[contactlastname]</a>" style="background:#C5000B;display:block;width:55px;height:55px;max-height:55px;border:0;"><img alt="Rate: Bad" src="<a href="http://www.mytechexperts.com/wp-content/uploads/2015/01/bad.jpg">http://www.mytechexperts.com/wp-content/uploads/2015/01/bad.jpg</a>" height="55" width="55" border="0"></a>
</td>
</tr>
</table>
The ratings (1,2, or 3) correspond to responses 1,2 and 3 on the CW survey. I had a problem sending a “0” to the API, which is why I have the first response on the survey as not used (it is response 0). I assigned the same values to responses: +100 for a good rating, 0 for an “eh” rating, and -100 for a bad rating. This creates the same calculations when you run the survey analysis in ConnectWise, as what you’re used to seeing with Nex.To.
I’ve attached some relevant files for you, as well.
Authentication – Developer Network
gravityforms-export-2015-12-16.json
Gravity Forms After Post – Submit to CW API to create servicesurvey